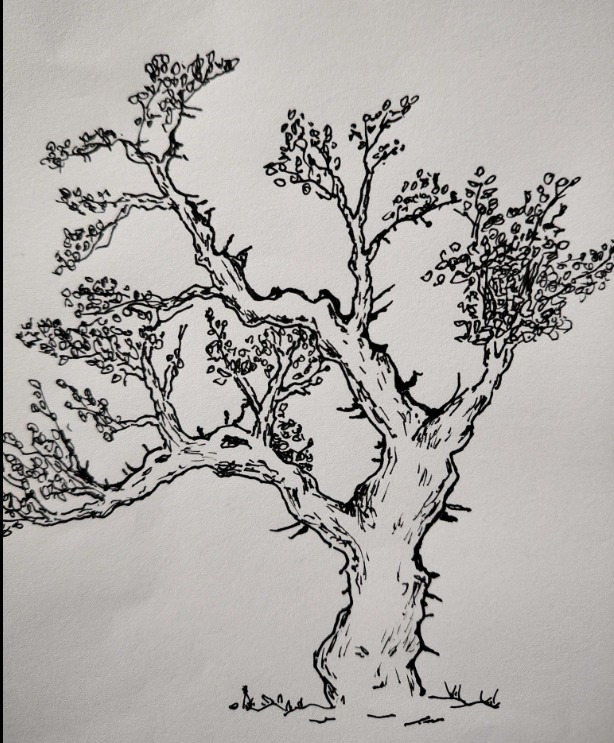
Pen-and-ink illustrations of trees have long held a special place in the hearts of artists and nature enthusiasts alike. There’s a timeless charm to the high-contrast look of black ink on white paper, especially when used to depict the complex, organic beauty of trees. In the featured illustration, twisting branches sweep across the page, with every knot and leaf rendered in precise, deliberate strokes. Whether you’re just beginning your artistic journey or looking to refine your technique, mastering the art of drawing trees in pen and ink is a rewarding way to express creativity while honoring the elegance of nature.
Why Trees Make Ideal Subjects for Ink Drawings
Trees are excellent subjects for ink work due to their rich textural and structural variety. The coarse texture of bark contrasts beautifully with the soft, intricate forms of leaves, allowing for experimentation with techniques like hatching, stippling, and crosshatching. The branching structure of a tree, with its twisting limbs and sprawling roots, challenges you to capture dimensionality and flow. Additionally, trees change dramatically with the seasons—from the stark silhouettes of winter to the full foliage of summer—giving you endless inspiration and variety for your artwork.
Essential Tools for Pen-and-Ink Tree Drawing
To get started, you’ll need a few key supplies:
-
Nib or Technical Pens: Choose fine nibs (typically 0.3–0.5 mm) for detailed textures, especially when working on bark or leaves. Technical pens provide consistent line width and precision.
-
India Ink or Brush Pens: For bold, dynamic lines, dip pens with India ink or brush pens offer a more fluid line quality and allow for expressive weight variation.
-
High-Quality Paper: Use smooth, heavy paper such as Bristol board or hot-pressed watercolor paper to prevent ink bleed and preserve sharp lines.
-
Pencils and Erasers: Begin with light pencil sketches using H or HB pencils. A kneaded eraser helps remove preliminary lines cleanly once your ink work is done.
Having the right tools ensures your lines stay crisp and your textures remain detailed throughout your drawing.
Step-by-Step Guide to Drawing Trees in Ink
Step 1: Observation and Initial Sketch
Begin by observing the tree carefully. Focus on the overall shape, the movement of the trunk, the way branches split, and the general silhouette of the canopy. Make a few small, quick thumbnail sketches to explore different compositions. Once you settle on a layout, lightly sketch the main trunk, major branches, and canopy outline on your final sheet. This light foundation will help guide your ink work and keep your drawing balanced and intentional.
Step 2: Inking the Trunk and Branches
Start adding ink to define the core structure. Use heavier lines for the outer edges of the trunk and lighter, finer lines for the inner textures and smaller branches. Use curved hatching to suggest the natural grain of the bark. In deeper crevices, crosshatching helps add shadows and depth. Pay special attention to branch junctions—darken these areas slightly and let the lines taper off to capture the gradual thinning of branches. Think of the trunk as the skeleton—it sets the stage for everything else.
Step 3: Drawing the Leaves and Foliage
Leaves can be tricky, but simplifying your approach helps. Instead of drawing every single leaf, suggest clusters. Use curved lines to define the edge of the canopy and sprinkle in loosely shaped leaves. Stippling—placing small dots—can add shading and texture, especially in denser parts of the canopy. Let your stipples and lines follow the direction of the branches to maintain a sense of flow. The goal is to create the illusion of a full, three-dimensional tree without overwhelming the viewer with detail.
Step 4: Adding Roots and Background Elements
A well-drawn tree feels grounded in its environment. Indicate exposed roots by using curved lines that follow the surface of the ground. Add grass, fallen leaves, or rocks around the base using minimal but effective linework. For subtle background contrast, lightly hatch behind the canopy to make the tree stand out. These small touches provide a sense of place and make the illustration feel more immersive.
Common Mistakes to Avoid
Even seasoned artists can make missteps. Here are a few to watch out for:
-
Over-detailing: Too many lines can make your drawing feel cluttered. Know when to stop and let white space do some of the work.
-
Inconsistent Light Source: Always choose a light source direction and keep your shading techniques consistent across the drawing.
-
Uniform Line Weight: Flat, same-width lines make your drawing feel lifeless. Use variation in line weight to emphasize structure and depth.
-
Imbalanced Composition: A dense top canopy without visual grounding can look unstable. Balance the tree with elements at the base or thoughtful use of negative space.
Staying aware of these common pitfalls helps keep your artwork clean, expressive, and visually engaging.
Sharing and Showcasing Your Work
After completing your tree drawing, take the time to present it well. Scan it at high resolution to capture every detail. Use editing software like Photoshop or GIMP to clean up smudges and adjust contrast. If you’re printing, choose fine art paper like textured cotton rag to replicate the original’s richness. For display, use simple frames and neutral mats that highlight the inkwork. Sharing process videos or step-by-step photos on social media can help build an audience and show the effort behind your creation.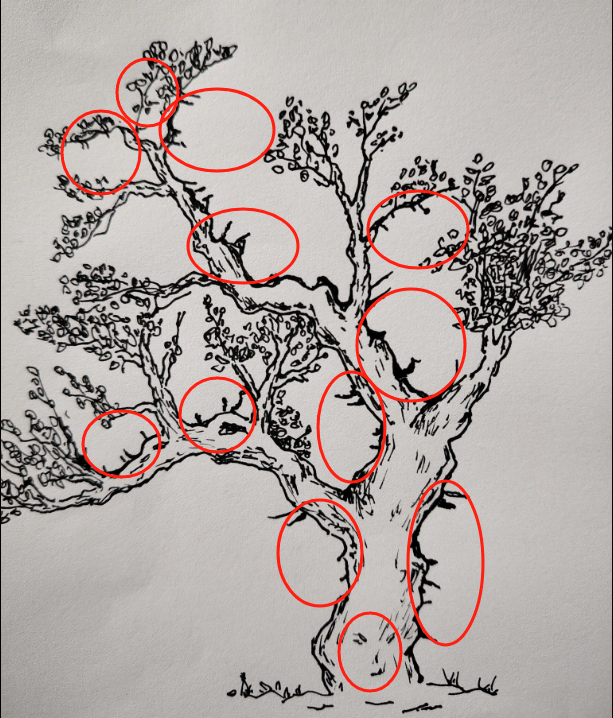
Conclusion: A Journey Rooted in Observation and Patience
Drawing trees in pen and ink combines meticulous observation with expressive mark-making. Each stage—from choosing tools and sketching the form to inking bark textures and capturing light through leaves—brings you closer to the subject and sharpens your skills. Trees symbolize growth, resilience, and quiet strength, and each ink drawing can reflect these qualities. So grab your pen, step outside, and start sketching. With time and practice, your collection will grow into a beautiful forest of artistry.